Downsizing your home for retirement felt like the biggest project of my life, even after 38 years as a civil engineer. It’s more than just getting rid of things; it’s about strategically creating space for your next chapter.
For Dorothy and me, it was about embracing a simpler lifestyle and aligning our living situation with our future goals, which for me meant a warmer climate and less yard work.
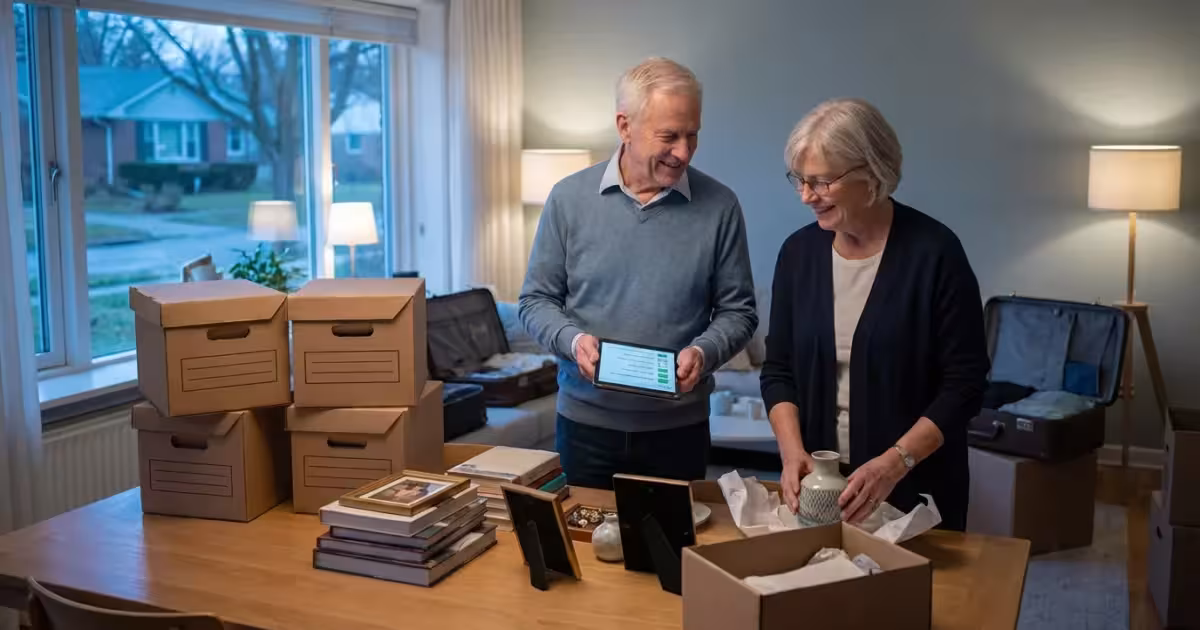
I’ll admit, the process can feel overwhelming when you’re looking at what I once estimated to be “approximately one metric ton of stuff we don’t need” from 44 years on Elmwood Drive in Columbus. But with a clear strategy and a methodical approach, I can tell you it’s entirely manageable.
This comprehensive retirement downsizing checklist is based on what Dorothy and I actually did. It provides the practical steps and, yes, even some understanding for the emotional side of things.
You’ll discover how to declutter, organize, and transition to a right-sized living space with confidence and clarity. My goal here is to empower you to make informed decisions for your comfort and peace of mind, just like I aimed to do for our own move.

Embracing Right-Sizing: Your Mindset Matters
The word “downsizing” can sound like you’re giving something up. I prefer to think of it as “right-sizing.” When I was researching 55+ communities for two full years before we moved to Hawthorn Ridge, I wasn’t looking to reduce our life; I was looking to optimize it.
I wanted a home that perfectly suited our current needs and our future aspirations.
A right-sized home means less maintenance, which translates directly to lower utility costs and more freedom. For me, that meant more time for pickleball and volunteering, not fixing a leaky roof or mowing a half-acre lot.
It allows you to focus on experiences, travel, hobbies, and family, rather than being tied to the upkeep of a large property. I recognized this shift as an opportunity for renewal and liberation, and I’m glad Dorothy eventually came around to it too.
I found this to be profoundly true. All the possessions we accumulated in our 2,400 sq ft colonial on Elmwood Drive felt like a physical and emotional weight. There’s immense freedom when you release yourself from that burden.
Approaching this process with a positive, practical mindset transforms a challenging task into an empowering journey, even if it took Dorothy a full year to truly embrace it.
The Master Downsizing Checklist: Preparation and Planning
Effective planning is crucial for a smooth downsizing experience. Starting early allows you to work at a comfortable pace, reducing stress and preventing last-minute rushes. I began this journey with thoughtful preparation long before Dorothy was ready to consider it.
Set Your Goals and Timeline
I spent two full years researching 55+ communities, building a comparison matrix with 14 variables to figure out exactly what we wanted: somewhere warm, low maintenance, and with plenty of activities. Understanding our destination – Hawthorn Ridge in Sarasota, Florida – helped us determine what we truly needed to bring.
I found that a three to six-month timeframe for the actual sorting and moving works best once you’ve made the decision, allowing ample time for sorting, selling, donating, and moving. I broke down this larger goal into smaller, manageable milestones, which was essential for keeping Dorothy from getting overwhelmed.
Gather Your Supplies
Having the right tools makes the process more efficient. I stocked up on these essentials before we really began, knowing it would save time and frustration:
- Sturdy moving boxes in various sizes
- Packing tape and dispensers
- Permanent markers for labeling
- Bubble wrap and packing paper
- Large trash bags
- Donation bags or boxes
- Cleaning supplies
- A shredder for sensitive documents
- Gloves for dusty areas
- Digital camera for inventory and memories
Create a Sorting System
A consistent sorting system keeps you organized and focused. I designated clear categories for every item we touched – and believe me, we touched a lot:
- Keep: Items moving with us to our new home in Sarasota.
- Donate: Items in good condition that could benefit others.
- Sell: Valuable items that we wished to monetize (though frankly, most of our stuff wasn’t that valuable).
- Gift/Give to Family: Heirlooms or items specifically for Karen, Michael, and Susan.
- Discard: Broken, expired, or unusable items.
I labeled our boxes and even specific areas clearly with these categories. This prevented confusion and streamlined the decision-making process, especially when Dorothy and I had different ideas about an item’s future.
Start Small, Build Momentum
Don’t attempt to tackle your entire home at once. I started with an easy area, like my toolbox in the garage, just to get a feel for the process. Success in these smaller tasks builds confidence and momentum for larger projects.
You’ll learn what works best for your decision-making style, and it helps you get a sense of how long each type of item takes.

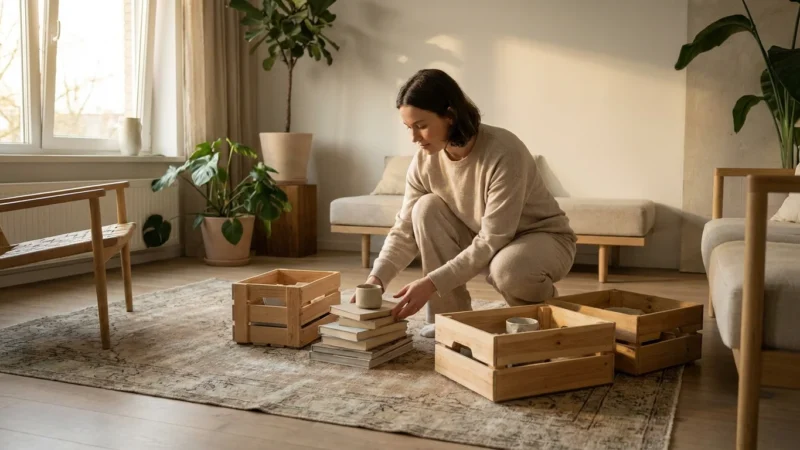
Room-by-Room Decluttering: Your Practical Guide
A room-by-room approach provides a systematic way to manage your decluttering. This strategy breaks a large task into manageable segments, making the process less overwhelming.
Take one room at a time, or even one section of a room. I can tell you from experience, this is the only way to tackle a house you’ve lived in for over four decades.
The Kitchen: Practicality and Duplicates
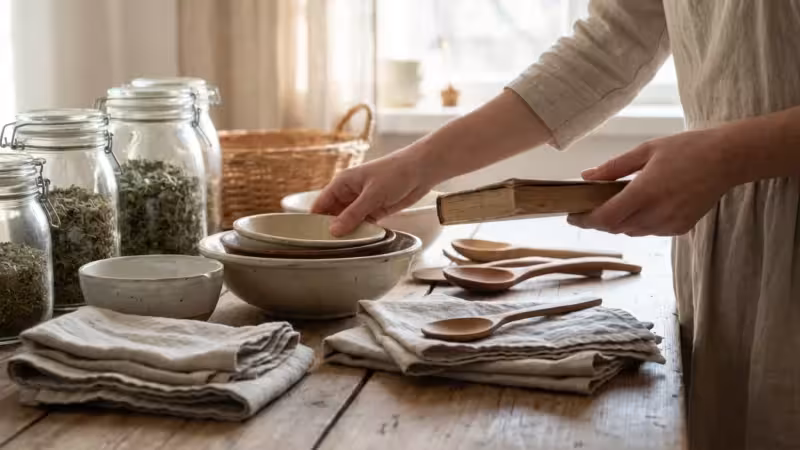
The kitchen often holds an astonishing array of items, many of which are rarely used. As the unexpected cook of the house now, I can tell you to focus on utility and necessity here. We probably had three sets of mixing bowls and enough Tupperware to feed a small army.
- Empty Cabinets and Drawers: Take everything out. This allows you to see exactly what you own. You’ll be surprised.
- Assess Cookware and Bakeware: How many pots, pans, and baking sheets do you truly need? Keep a versatile set. I decided which non-stick and stainless steel pans I actually used regularly for my new cooking hobby.
- Review Small Appliances: We had multiple blenders, food processors, and specialty gadgets. I kept only the ones I use at least once a month. The bread maker Dorothy used twice in 10 years? Gone.
- Sort Dishes and Glassware: We kept enough for our daily use and for occasional guests, but we certainly didn’t need the full 12-place setting china set we registered for 50 years ago.
- Check Pantry Items: Discard expired food. Donate unopened, non-perishable items.
- Address Utensils and Gadgets: Eliminate duplicates. Did we need five spatulas? Definitely not.
Consider your new kitchen space. Our new home in Hawthorn Ridge has less cabinet and counter space, so ruthless culling here paid off immensely.
The Living Room and Dining Room: Furniture and Decor
These social spaces often contain larger items and decorative pieces. Think about the scale of your new home. Our 2,400 sq ft colonial on Elmwood Drive had a formal living room and dining room, something our new Florida home doesn’t. We had to be realistic.
- Evaluate Furniture: I measured our current furniture and compared it to the dimensions of our new living space. Our huge sectional sofa and the dining table that sat 10 simply wouldn’t fit comfortably in our new open-concept living area.
- Assess Decorative Items: Figurines, vases, framed art, and knick-knacks accumulate over years. We selected a few truly cherished pieces that would enhance our new home, mostly items the kids had made or photos.
- Books and Media: Dorothy, the former librarian, had a lot of books. We decided which ones we’d reread or truly cherished. We donated hundreds to libraries and charities. I pushed for switching to e-readers for future reading, and we digitized old CDs and DVDs.
- Area Rugs and Lamps: These items can define a space. We kept only what served a purpose and fit our new aesthetic.
Remember that every piece of furniture takes up valuable real estate in a smaller home. Prioritize comfort and functionality. I had to remind Dorothy of this often when she looked at her favorite armchair.
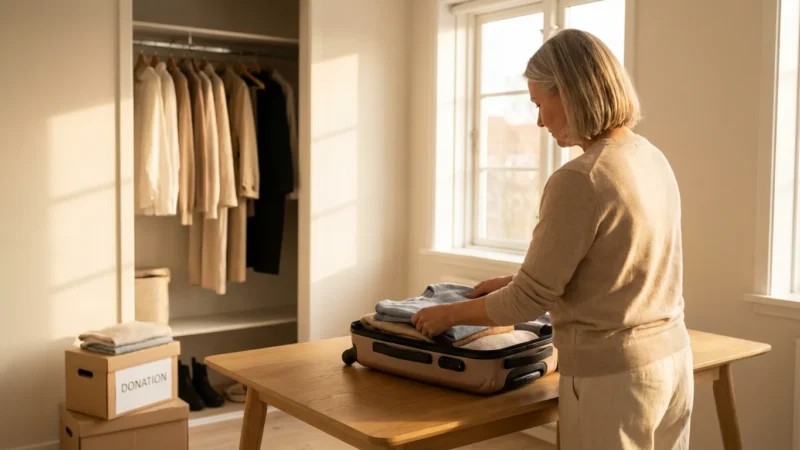
Bedrooms and Closets: Clothing, Linens, Personal Items
Closets are notorious for hidden clutter. This area benefits from a methodical approach, and Dorothy’s closet was a significant project.
- Clothing:
- We removed all clothing from our closets and drawers.
- We used the “one-year rule”: If you have not worn it in a year, consider letting it go.
- We kept only clothing that fit well, was in good condition, and made us feel good.
- We separated seasonal clothing, knowing our Florida home wouldn’t need heavy winter coats.
- Linens:
- We kept only two to three sets of sheets per bed we owned.
- We discarded old towels and washcloths, keeping a reasonable number.
- We limited decorative pillows and throws to those we truly used.
- Personal Items:
- Jewelry: Dorothy kept sentimental pieces and those she wears regularly. We considered selling valuable items she no longer used.
- Shoes and Accessories: Be realistic about what you will wear. I certainly didn’t need all those old ties.
Donation centers like Goodwill gladly accept gently used clothing and linens, providing them a second life. We made several trips.
Bathrooms: Supplies and Medicines
Bathrooms, though small, can hide a surprising amount of clutter. I went through ours with a fine-tooth comb.
- Medications: I safely discarded expired prescription and over-the-counter medications. I made sure not to flush them down the toilet and checked local disposal guidelines.
- Toiletries and Cosmetics: We got rid of anything expired or nearly empty. We consolidated duplicates.
- Cleaning Supplies: We kept only the essentials. Our new home requires fewer specific products for maintenance.
My focus was on creating a clean, calm, and functional space, free from unnecessary bottles and containers. Efficiency, you see.
Home Office or Den: Papers, Books, Digital Decluttering
This area often presents the biggest challenge due to paperwork and digital files. As someone who managed our finances with what Dorothy calls “a level of detail that belongs in a NASA mission,” this was my domain.
- Physical Papers:
- I sorted through old bills, statements, and documents.
- I shredded anything with personal information that we no longer needed.
- I scanned important documents to create digital copies, then shredded the originals if safe to do so. This was a huge undertaking.
- I kept only essential legal documents, tax records (for the required number of years), and medical histories.
- Books: Dorothy and I were selective. We kept favorites, reference books I actually use, and those with significant sentimental value. We donated the rest to libraries, schools, or charities.
- Digital Decluttering:
- I organized my computer files, deleted duplicates, and backed up important data to an external hard drive and a cloud service.
- I deleted old emails and unsubscribed from unnecessary newsletters.
- I consolidated digital photos, deleted blurry or duplicate images, and backed up our curated collection for the grandkids to enjoy.
I always consider the IRS guidelines for how long you need to keep tax documents when making decisions about financial paperwork. Digitizing helps immensely with reducing physical clutter. You can find useful organizing tips on sites like The Spruce.
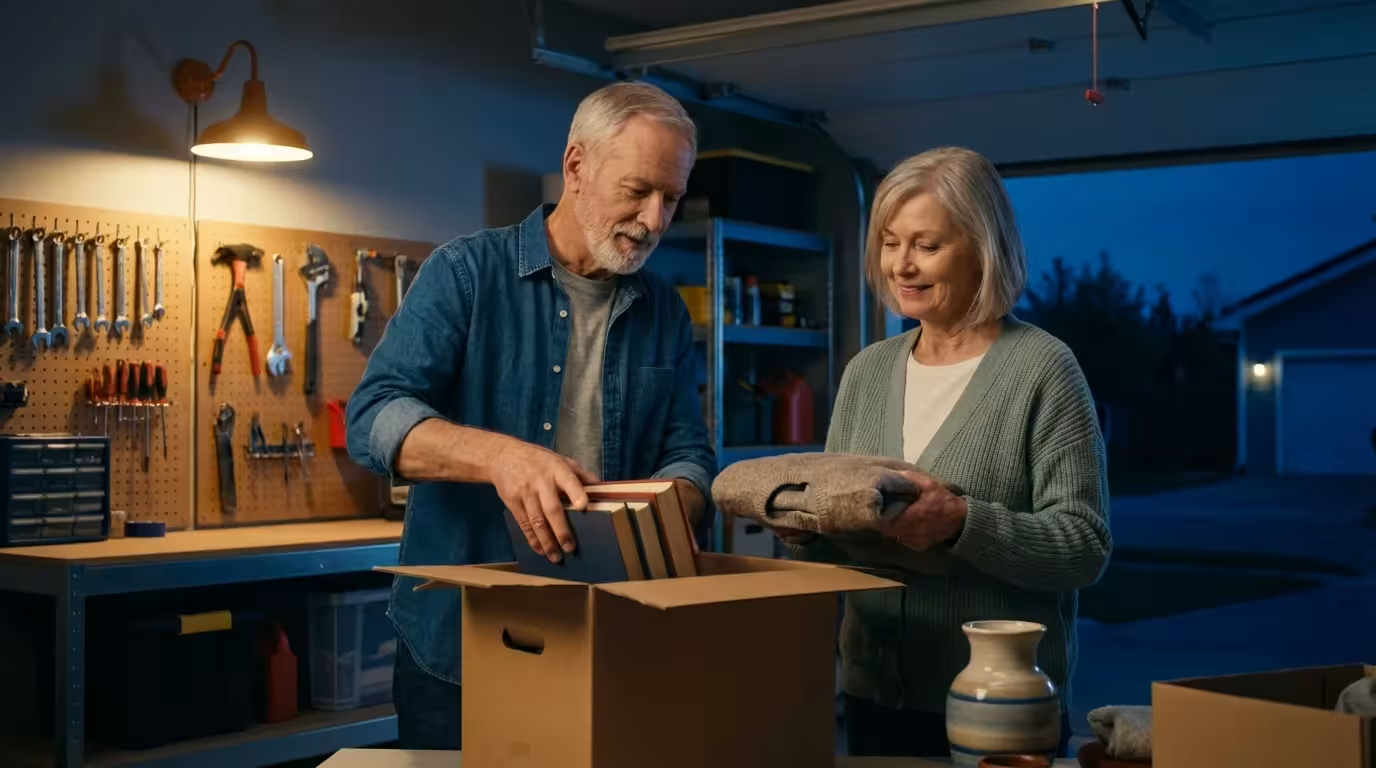
Garage, Attic, and Basement: Tools, Seasonal Items, Storage
These areas often become repositories for forgotten items. This is where I found most of that “metric ton of stuff.” We tackled them methodically.
- Tools: I kept a basic set of household tools for any minor repairs in our new place. I ended up donating or selling many of my specialized engineering tools that I no longer needed.
- Seasonal Decorations: We were highly selective. We kept a few cherished holiday items that would fit in our new, smaller space. The giant inflatable Santa? Gone.
- Sports Equipment and Hobbies: I kept my pickleball paddles, of course. We let go of equipment for activities we no longer actively pursued.
- Old Paint Cans, Chemicals: I researched local hazardous waste disposal sites. Never put these in regular trash.
- Future Projects: I had to be realistic about projects I would actually complete. I let go of supplies for long-forgotten intentions, like the woodworking tools I hadn’t touched in a decade.
These spaces are typically the most overwhelming, so patience and a systematic approach are your best allies. And a lot of trash bags.
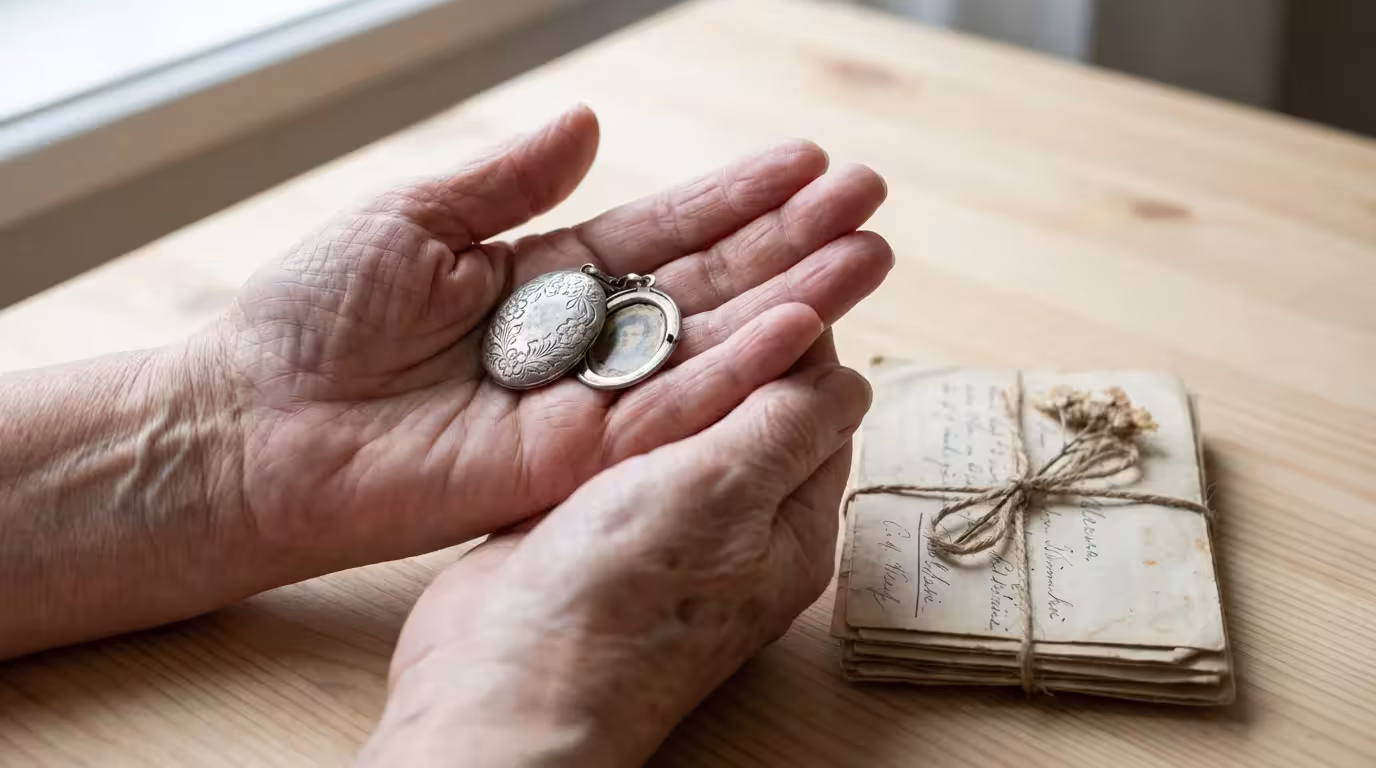
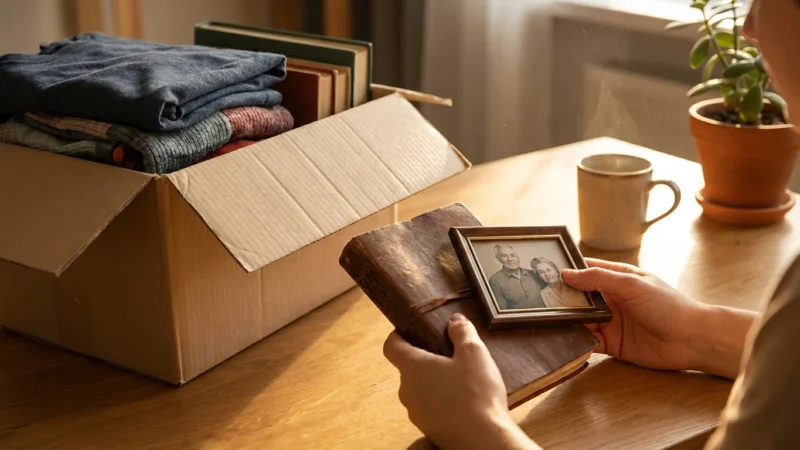
Navigating Sentimental Items and Family Heirlooms
This was often the most emotionally challenging part of downsizing, especially for Dorothy. Sentimental items connect you to your past, your identity, and your loved ones. It’s okay to feel emotional during this process, though my approach was usually to find a practical solution for each item.
Strategies for Sentimental Items
- Acknowledge and Process: I learned to give Dorothy time to feel the emotions that arose. Picking up an item and reminiscing is a natural part of letting go, even if it slowed down the process.
- The “Memory Box” Approach: We designated one or two small boxes for truly cherished items. This limits the quantity while preserving the most meaningful mementos. It was a good compromise.
- Digitize Memories: I made sure to take photos of items we couldn’t keep but wanted to remember. I also spent a lot of time creating a digital scrapbook of old photographs, cards, and the kids’ artwork.
- Share Stories, Not Just Stuff: When gifting heirlooms to Karen, Michael, or Susan, I made sure to tell them the stories behind the items. The narrative often holds more value than the item itself.
- Focus on the Future: I reminded both Dorothy and myself that our memories reside within us, not solely within our possessions. We were making space for new experiences and memories here in Florida.
You don’t need to keep every item to hold onto your memories. Choose wisely, and let your future self thank you for the lightness this brings. I certainly appreciated the lighter load when it came to packing the moving truck.
What to Do with Your Decluttered Items
Once you decide what to let go of, you need a plan for its departure. Having clear destinations for your items reduces clutter accumulation and ensures a smooth transition. This was an area where my planning skills really came in handy.
Donating
Donating is an excellent way to give your gently used items a second life while potentially providing a tax deduction. I kept meticulous records of our donations for that reason.
- Goodwill and Salvation Army: We made several trips, dropping off clothing, household items, and some smaller furniture. Always check their websites for specific accepted items.
- Habitat for Humanity ReStore: We found they accepted some of our older appliances and building materials, which was a great way to help a good cause.
- Local Charities and Shelters: We researched local needs in Columbus and found a women’s shelter that was grateful for some of Dorothy’s extra linens and kitchenware.
- Libraries: Dorothy took many of her books to the local library.
Remember to get a receipt for your donations for potential tax benefits. The IRS provides guidance on charitable contribution deductions.
Selling
Selling items can recoup some costs or provide extra funds for your move. We considered the time and effort involved and decided what was worth the trouble.
- Online Marketplaces: We used Facebook Marketplace for some of our larger furniture pieces and older electronics. It was effective, but you need patience.
- Consignment Shops: We looked into this for a few higher-quality pieces, but ultimately decided against it due to the commission.
- Estate Sales: For a large volume of items, an estate sale company manages the entire selling process in your home. Companies like those listed on EstateSales.net specialize in this. We considered this option for our Columbus house but ended up selling most things ourselves or donating.
- Garage or Yard Sales: Best for lower-value items. We had a couple of these, and while they were time-consuming, it was satisfying to see things go.
Be realistic about the value of your items. What was once expensive may not command a high price now.
Gifting to Family and Friends
We offered specific items to Karen, Michael, and Susan who expressed genuine interest and had space for them. I made sure to avoid pressuring anyone to take items. We clearly communicated if an item was a gift or if we expected it back (which was rare).
Discarding and Recycling
Some items are simply trash or require specific recycling. I separated these categories carefully.
- General Waste: Broken items, worn-out clothing, anything beyond repair.
- Recycling: Cardboard, plastics, glass. I checked our local Columbus recycling guidelines.
- Hazardous Waste: Paint, chemicals, old electronics. I contacted our local waste management facility for proper disposal methods. This is critical for environmental safety.
Planning for pickup or drop-off of these items prevents them from lingering in your home and becoming another problem.

Professional Help: When to Call in the Experts
You don’t have to do this alone. Various professionals can provide invaluable support, especially during a significant retirement downsizing project like ours was.
Senior Move Managers
Senior move managers specialize in assisting older adults with all aspects of relocating. I considered them for their comprehensive services, which can include:
- Creating a floor plan for your new home.
- Sorting, organizing, and decluttering.
- Coordinating movers and packing services.
- Managing the sale or donation of unwanted items.
- Unpacking and setting up your new home.
They bring expertise, efficiency, and a compassionate approach. The National Association of Senior Move Managers (NASMM) provides a directory of certified professionals. You can find resources at NASMM.org.
Professional Organizers
If you primarily need help with decluttering and organizing, a professional organizer can guide you. They help you make decisions, establish systems, and tackle overwhelming areas of your home. While I prefer to organize things myself, I can see the value for others. The National Association of Productivity & Organizing Professionals (NAPO) offers a searchable directory of certified organizers at NAPO.net.
Estate Sale Professionals
If you have many valuable items or simply want a hands-off approach to selling, an estate sale company can manage the entire process. They appraise items, stage your home for the sale, advertise, conduct the sale, and clear out leftover items. We considered this option for our 44-year accumulation but ultimately handled most sales ourselves.
Appraisers and Auction Houses
For truly valuable items like fine art, antiques, or rare collectibles, consult an independent appraiser. They provide an accurate valuation, helping you decide whether to sell, insure, or keep the item. Auction houses are another avenue for selling high-value items. We didn’t have much in this category, but it’s good to know for those who do.
Preparing Your Home for Sale and Your New Space
After decluttering, my focus shifted to preparing our Columbus home for the market and envisioning our new living arrangement in Sarasota. This dual focus ensured a smooth transition.
Optimizing Your Current Home for Sale
I wanted to get the best possible price for our 2,400 sq ft colonial on Elmwood Drive, so I focused on the practical steps to make it appealing to buyers.
- Deep Clean: A sparkling clean home makes a powerful first impression. We hired professional cleaners to ensure every nook and cranny was spotless.
- Minor Repairs: I addressed all the leaky faucets, sticky doors, and chipped paint. These small fixes significantly enhance appeal and prevent buyers from seeing “problems.”
- Neutralize and Stage: We removed personal photos and bold decor. Presenting a neutral canvas where potential buyers can envision themselves living is crucial. Our decluttering efforts contributed greatly to this step.
- Curb Appeal: I tidied up the yard, trimmed bushes, and ensured the entrance was welcoming. First impressions count, especially from the street.
A well-prepared home attracts more buyers and often commands a better price. Consumer Reports offers practical advice on preparing your home for sale and moving tips on their website.
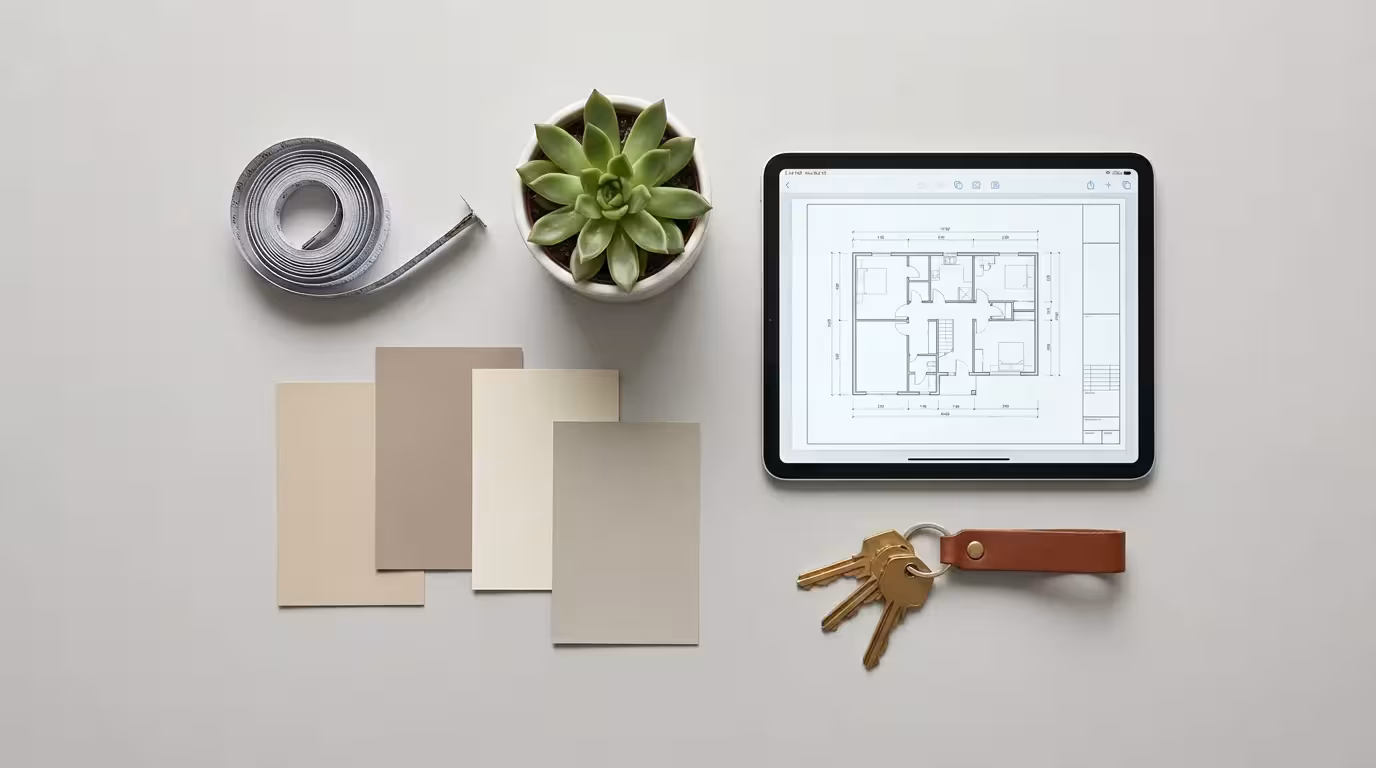
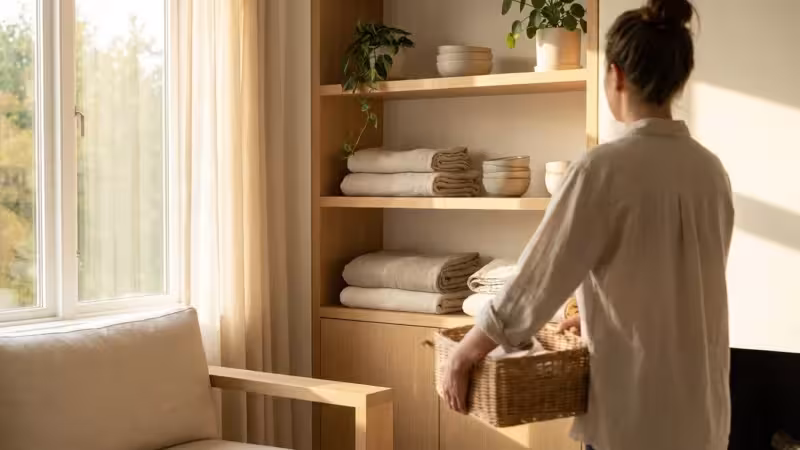
Planning Your New Living Space
Before moving, I created a detailed floor plan for our new home in Hawthorn Ridge. This helped us visualize exactly where our “keep” items would go. Knowing the dimensions allowed me to determine if furniture would fit and if we had adequate storage for our remaining possessions. This was a critical step in my 14-variable matrix planning.
- Measure Furniture: I confirmed that our selected pieces would fit through doorways and into designated spaces in our new Florida home.
- Consider Storage Solutions: I thought about vertical storage, multi-functional furniture, and creative organizing solutions for a smaller footprint.
- Unpack Systematically: I labeled boxes clearly by room. We unpacked essentials first, then tackled other areas. This made settling in much less chaotic.
You reduce stress significantly when you arrive at your new home knowing exactly where things belong. This planning empowers you to settle in quickly and comfortably, and it helped us adjust to life in Sarasota much faster.
Frequently Asked Questions
How long does the average downsizing process take?
From my experience, the timeline for downsizing varies greatly based on the size of your current home, the amount of possessions you have, and your personal pace.
For Dorothy and me, the debate alone took nearly two years! But the actual sorting, selling, and packing once we decided took about six months. Beginning early and breaking the process into manageable steps helps prevent overwhelm and allows you to make thoughtful decisions without rush.
What is the biggest challenge people face when downsizing?
I observed that emotional attachment to belongings represents the most significant challenge for many individuals. Each item can hold memories, identity, or historical significance.
Overcoming this involves acknowledging those feelings, allowing time for reflection, and then focusing on the practical future benefits of a simplified life rather than the perceived loss of possessions. Dorothy definitely felt this more than I did.
How can adult children best help their parents downsize?
Adult children can provide invaluable support by offering practical assistance, patience, and empathy. Help your parents by organizing, packing, and researching resources, but always respect their decisions regarding their belongings.
Avoid making unilateral decisions or pushing too hard. Focus on being a supportive partner in the process. Remember, it is their home and their memories, not yours.
Should I rent a storage unit for items I can’t part with?
I generally advise against it. Consider a storage unit only as a very temporary solution. Long-term storage often becomes a costly extension of your clutter, and it’s money better spent elsewhere. Before renting, critically evaluate if you truly need those items in the future.
If you foresee needing them within a year and they hold significant value or sentimental importance, a storage unit might be justifiable short-term. Otherwise, aim to integrate everything into your new home or let it go.
What’s the best way to handle old photos and digital files when downsizing?
For physical photos, prioritize by keeping truly cherished ones and digitizing the rest. Scan photos at a high resolution, then store the digital copies on cloud services or external hard drives.
For digital files, delete duplicates, organize into clear folders, and back up everything important. This preserves memories without physical bulk and prevents loss, which is crucial for our family history.
Disclaimer: This article is for informational purposes only. Downsizing decisions are deeply personal and should be made at your own pace. If you’re struggling with the emotional aspects of letting go, consider speaking with a counselor or therapist who specializes in life transitions. For valuable items, consult with appraisers or estate professionals.


Leave a Reply